* if my accent is difficult to understand, here is the text PDF file of the narration:
About this project:
A Hidden Flash-Memory That Only you know how to turn it on and use it secretly.
This is a DIY hack project that allows you to recycle your broken hard-drives back to live and turn them to something useful.
here are the costs and list of devices for those who will love to make their own:
1.the HDD, $8 from 2nd hand shop.
2.The light sensor light, $5 from electricity store,(it was new being honest).
3.the 5V DC relay, $5 from electronic shop (new)
4.the resistors $4 from electronic shop (new), you can use old ones too from some broken circuit.
5.the clip lights amount 2, each around $6, it was used only by me.
6.USB cable $3 from 2nd shop.
7.USB charging cable for phone, $4 from computer store (new).
8.LEDs $12 from DIY store, New.
9.Pen hold wood chunk, and super Glue around $6, DIY store New.
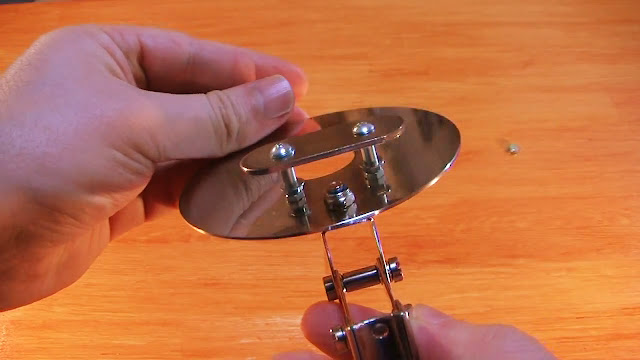
10. Metal little thing for the smartphone stand and nuts and bolts, total around $7 from DIY store.
11. Switch $4 new, you can use an old one too.
12. the variable resistor and diode, from an old PC power supply, i had at home.
13.Transistor got it from an old circuit, anyone would work, just while it comes about NPN and PNP, just
little different connections.
14.Flash memory $ 6, i had at home.
15.little PCB, $4 from DIY store, new.
16. little flash light $2 from DIY store.
total:
$ 74 ~ $80
with this amount ($80) you can build your own, and use it for ever and enjoy it.
This is the full Schematic Diagram:
QR-Code:
http://goo.gl/7e5o9.qr
Notes about the schematic:
1.on the PDF, there is a Variable Resistor 2Kohms, i forgot the Zero, sorry, it is 20Kohms.
2.the DC source polarities for LED's mistakenly connected in reverse, please correct them on your own drafts.
sorry for that.
3.all the electronic devices for this project are calculated based on the PC-USB output rating of 900mA.
keep in mind if YOUR PC's USB output rating is 500mA, then you should calculate all the devices based on that 500mA, or if you use a laptop, find out the max power output of your laptop main-board.
if you over-current your USB port, it will halt your pc and you need to restart the pc, there is an Internal current controller on all mainboards for USB current, but you should not exceed the allowed max current.
Hint. if you still love to use all, then an external power-source would solve all USB current limitations and problems.
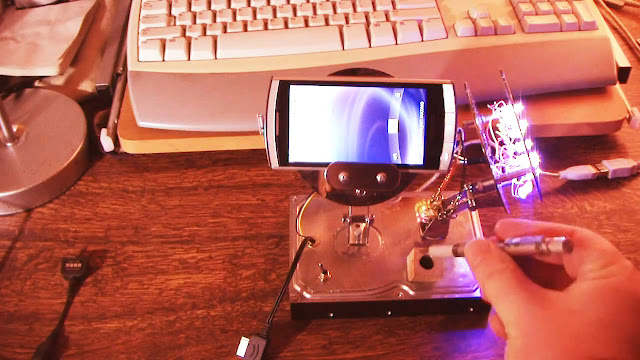
This project has got several functions as follows:
1. it is an LED desktop light while studying or can be used as monitor light.
2. it is a pen holder on desk-top.
3. it is a cell phone stand, or holder and a cell phone USB charger, it charges the cell-phone as soon as you connect the cable to your cell phone.
4. There is a hidden flash drive that has no way to be detected by the computer, unless you trigger the LDR sensor by an external single LED flash light. The flash light generates a small signal on the LDR surface and that small signal is enough to BASE Biasing of the transistor to allow a significant current through the relay coil and turn on the positive DC source for the flash-drive.
A PDF map and detail, with calculation of this project is available and you can download them for free.
Or send me an email if you had more question, the email address is on my channel, and this is the link to my channel:
www.youtube.com/user/SAMIMYS
Note: as there you see on the video, i showed a white USB cable for charging the smartphone, but later on table the white one was replaced to a black smartphone charger,
it was due to interface size and shape of those 2 types of USBs but connections are not changed on the circuit.
# some tips for those who want this project to be more secure:
1.making it double sensors, for example one Sound sensor beside LDR, so even if you insert the LED, it still would wait for your clapping to turn on the flash drive.
2.increase the resistor of the LDR, it means it cannot trigger the transistor Base if the light intensity is less than 3800mcd (one typical LED with full current 30mA).
3.bringing rout of the circuit to one of those small pins of HDD choosing Master and slave, that is the cute one :) and hard to find.


No comments:
Post a Comment